How to Install a Car Stereo Easily and Effectively?
Installing a car stereo can seem daunting, but it doesn’t have to be. With the right approach and tools, car stereo installation becomes simpler and more manageable. Many car owners often worry about potential complications, yet most installations require basic skills. It's essential to understand your vehicle's wiring and connections, making the process smoother.
The excitement of upgrading your audio system can quickly turn into frustration. Unexpected issues may arise during car stereo installation. Perhaps the wires do not match, or the mounting kit is not compatible. Each challenge teaches you something new. Identify the problem, and troubleshoot to find solutions. This process helps you learn about your car’s electrical system.
Attention to detail is crucial. Properly connect the wires to avoid sound issues later. Poor connections can overshadow the quality of your new stereo. Take your time. Double-check each step to ensure quality results. Embrace the learning experience as you dive into car stereo installation. It’s more than just a task; it’s a chance to enhance your driving experience.
Gather Necessary Tools and Materials for Car Stereo Installation
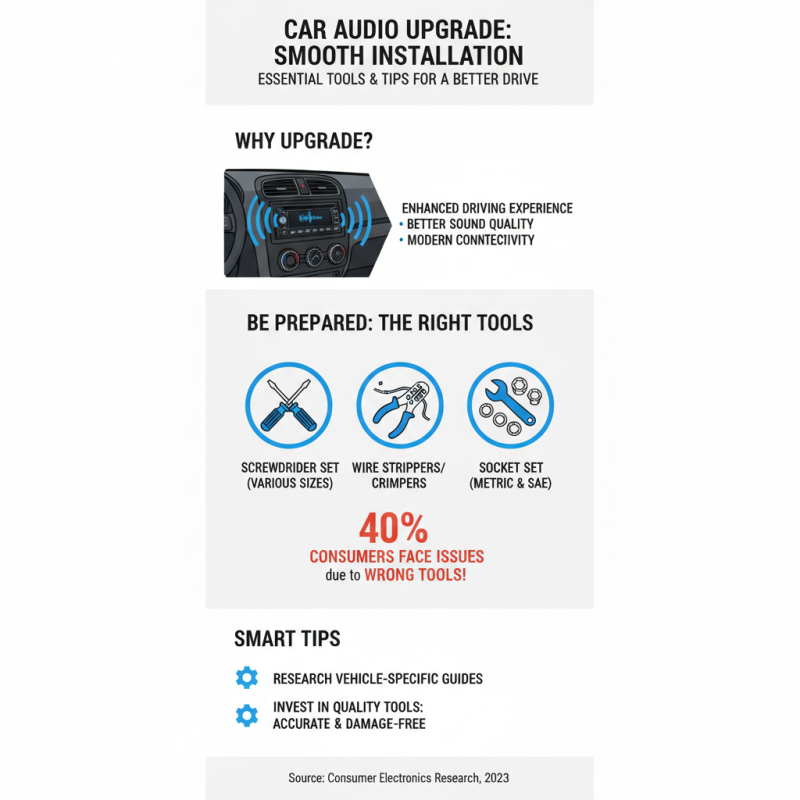
Installing a car stereo can significantly enhance your driving experience. Gathering the right tools and materials is essential for a smooth installation. Research shows that over 40% of consumers encounter issues due to improper tool selection. Basic tools include a screwdriver set, wire strippers, and a socket set. Investing in these items is a wise choice; they ensure accurate assembly and prevent damage.
You will also need an installation kit specifically designed for your vehicle. Many car owners overlook this step. A proper kit often includes brackets and harnesses tailored for easy fitting. According to industry reports, using the right installation kit reduces installation time by up to 30%. It’s not just about speed; a good kit improves the overall quality of the setup.
Lastly, consider the cables and connectors crucial for seamless operation. High-quality connectors can prevent electrical issues down the line. Yet, some users opt for cheaper alternatives, leading to malfunction. Ensure to use RCA cables or speaker wire that meets industry standards to maintain sound quality. Remember, rushing through the planning phase can lead to mistakes. Identifying these materials early can save you time and frustration during the installation.
Prepare Your Vehicle by Removing the Old Stereo Unit
Removing the old stereo unit is a crucial first step in upgrading your vehicle's audio system. Many owners may underestimate the importance of this phase. Statistics show that improper installation can lead to system failures in 20% of cases. It's essential to access the wiring and ensure a clean fit for the new unit.
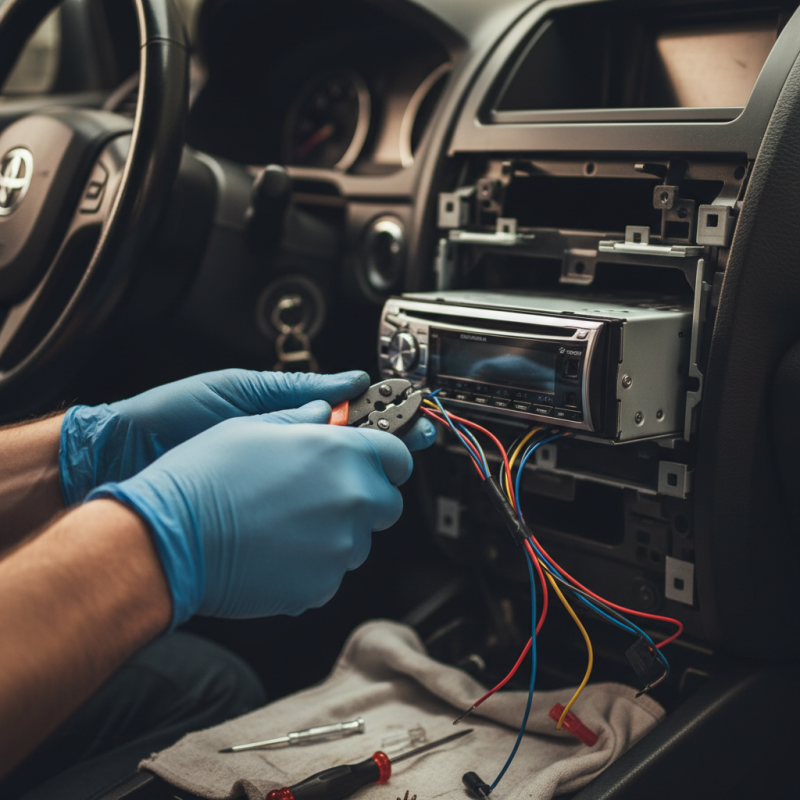
To start, gather the necessary tools. A screwdriver set, wire strippers, and electrical tape are commonly needed. Disconnect the car battery to avoid any electrical mishaps. Carefully remove the dashboard panels, which can be fragile. An additional 15% of users reported breaking clips or tabs during this step, often due to rushing.
After exposing the old stereo, unscrew and disconnect the wiring harness. It’s common to find accumulated dirt behind the stereo. A clean surface may help the new unit fit better. Take photos of the wiring for reference. Many people overlook this detail, leading to confusion during installation. Remember, attention to detail is vital. Aim for precision to ensure the best performance from your new stereo unit.
How to Install a Car Stereo Easily and Effectively? - Prepare Your Vehicle by Removing the Old Stereo Unit
| Step |
Description |
Tools Needed |
Time Estimate |
| 1 |
Disconnect the car battery. |
Wrench |
5 minutes |
| 2 |
Remove the dashboard panel if necessary. |
Screwdriver, Panel Removal Tool |
10 minutes |
| 3 |
Unscrew and remove the old stereo unit. |
Screwdriver |
10 minutes |
| 4 |
Disconnect the wiring harness and antenna cable from the old unit. |
None |
5 minutes |
| 5 |
Connect the wiring harness and antenna cable to the new stereo. |
None |
5 minutes |
| 6 |
Secure the new stereo into the dashboard. |
Screwdriver |
10 minutes |
| 7 |
Reattach the dashboard panel. |
Screwdriver, Panel Removal Tool |
10 minutes |
| 8 |
Reconnect the car battery and test the new stereo. |
Wrench |
5 minutes |
Connect Wiring Harness and Auxiliary Input for New Stereo
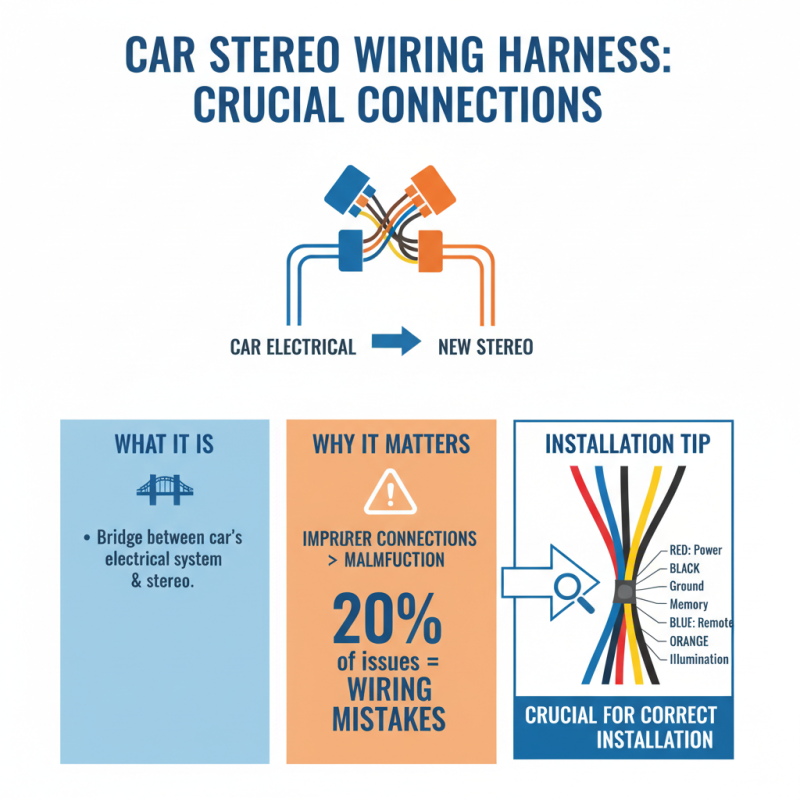
When connecting the wiring harness for your new car stereo, a clear understanding is essential. A wiring harness acts as the bridge between your car’s electrical system and the stereo. The industry has shown that improper connections can lead to malfunction. In fact, nearly 20% of stereo installation issues stem from wiring mistakes. Be sure to follow the color-coded wires closely. This is not just a detail; it’s crucial for correct installation.
Using an auxiliary input properly is equally important. Many modern vehicles come equipped with this feature, enhancing sound quality significantly. Studies reveal that about 70% of users prefer auxiliary inputs over traditional methods. However, remember that not all auxiliary inputs are created equal. Some may offer limited sound fidelity or intermittent connection issues. Testing the input before finalizing your installation is a smart step.
As you navigate the wiring connections, take your time. Rushing can lead to accidental skips or incorrect placements. Technical documents emphasize that meticulous work ensures longevity of the stereo. The process may feel tedious, but attention to detail pays off with a stable and high-quality sound experience. Be prepared for some trial and error. Learning from mistakes is part of the journey.
Install the New Car Stereo into the Dashboard
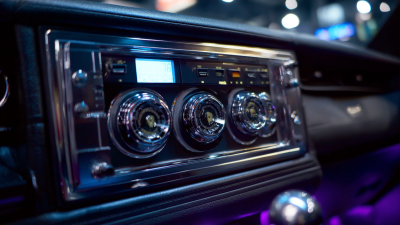
Installing a new car stereo is a practical way to enhance your driving experience. The dashboard is the central hub for your vehicle's audio system. As per a 2022 industry report, nearly 40% of car owners upgrade their stereo. Many desire better sound quality and modern features.
To start, gather essential tools like a screwdriver, wire stripper, and adapter harness. Make sure to disconnect the car battery to avoid electric shocks. Remove the old stereo carefully, as dashboards can be delicate. It's vital to handle everything gently to prevent unwanted damage.
Connecting the new stereo requires patience. Follow the wiring diagram carefully. Sometimes, wires may not match perfectly, requiring creative adjustments. This step is vital because improper connections can result in poor performance. After installation, some users find their new stereo doesn’t fit snugly in the dashboard. Small gaps may appear, prompting a need for customization. Observing these details makes a difference in the final look.
Test the Stereo Functionality and Make Final Adjustments
After installing your car stereo, it's crucial to test its functionality. Begin with basic audio functions. Play a variety of music genres. This helps you identify any sound issues promptly. If the sound is dull, check the equalizer settings. Sometimes, the default settings just don’t work well.
Adjust the balance and fade to match your preference. A centered sound does not always fit every car. Try shifting the audio balance toward the front or rear. This can dramatically enhance your listening experience. Also, verify all connections again. Loose wires can lead to problems that might go unnoticed initially.
Tip: If you hear distortion, consider adjusting the volume levels. Sometimes, lower settings produce clearer sound. Additionally, make sure the stereo is securely installed. A wobbling unit can affect your audio quality. Enjoy this process. Tweaking settings can uncover a sound profile that feels personal and rewarding.

 +86-18126757325
 CONTACT NUMBER
 CONTACT NUMBER